How to Show Hidden Files on Mac

When using a Mac computer, you might come across the need to access the ~/Library directory, which contains various important files and settings related to user-specific applications.
However, with recent macOS updates, Apple has made the ~/Library folder hidden by default to prevent accidental modifications. If you need to locate this directory for troubleshooting or customization purposes, follow the steps below.
Table of Contents
Method 1: Using Finder

- Open a new Finder window.
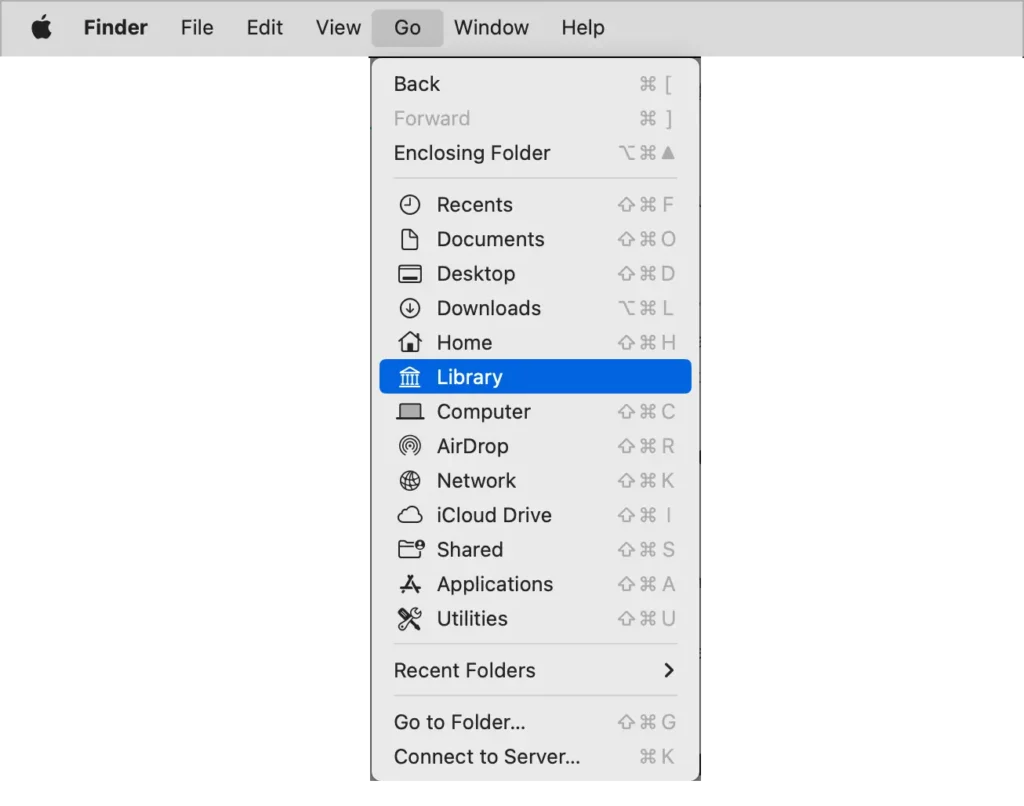
- In the menu bar at the top, click on the “Go” option.
- While holding the Option key, the Library option will appear in the drop-down menu. Click on it.
- The
~/Libraryfolder will open in a new Finder window, allowing you to access its contents.
Method 2: Using the Terminal
- Launch the Terminal application on your Mac. You can find it in the “Utilities” folder within the “Applications” directory.
- In the Terminal window, type the following command and press Enter:
open ~/Library - The
~/Libraryfolder will open in a Finder window.
Method 3: Using Go to Folder

- Open a Finder window.
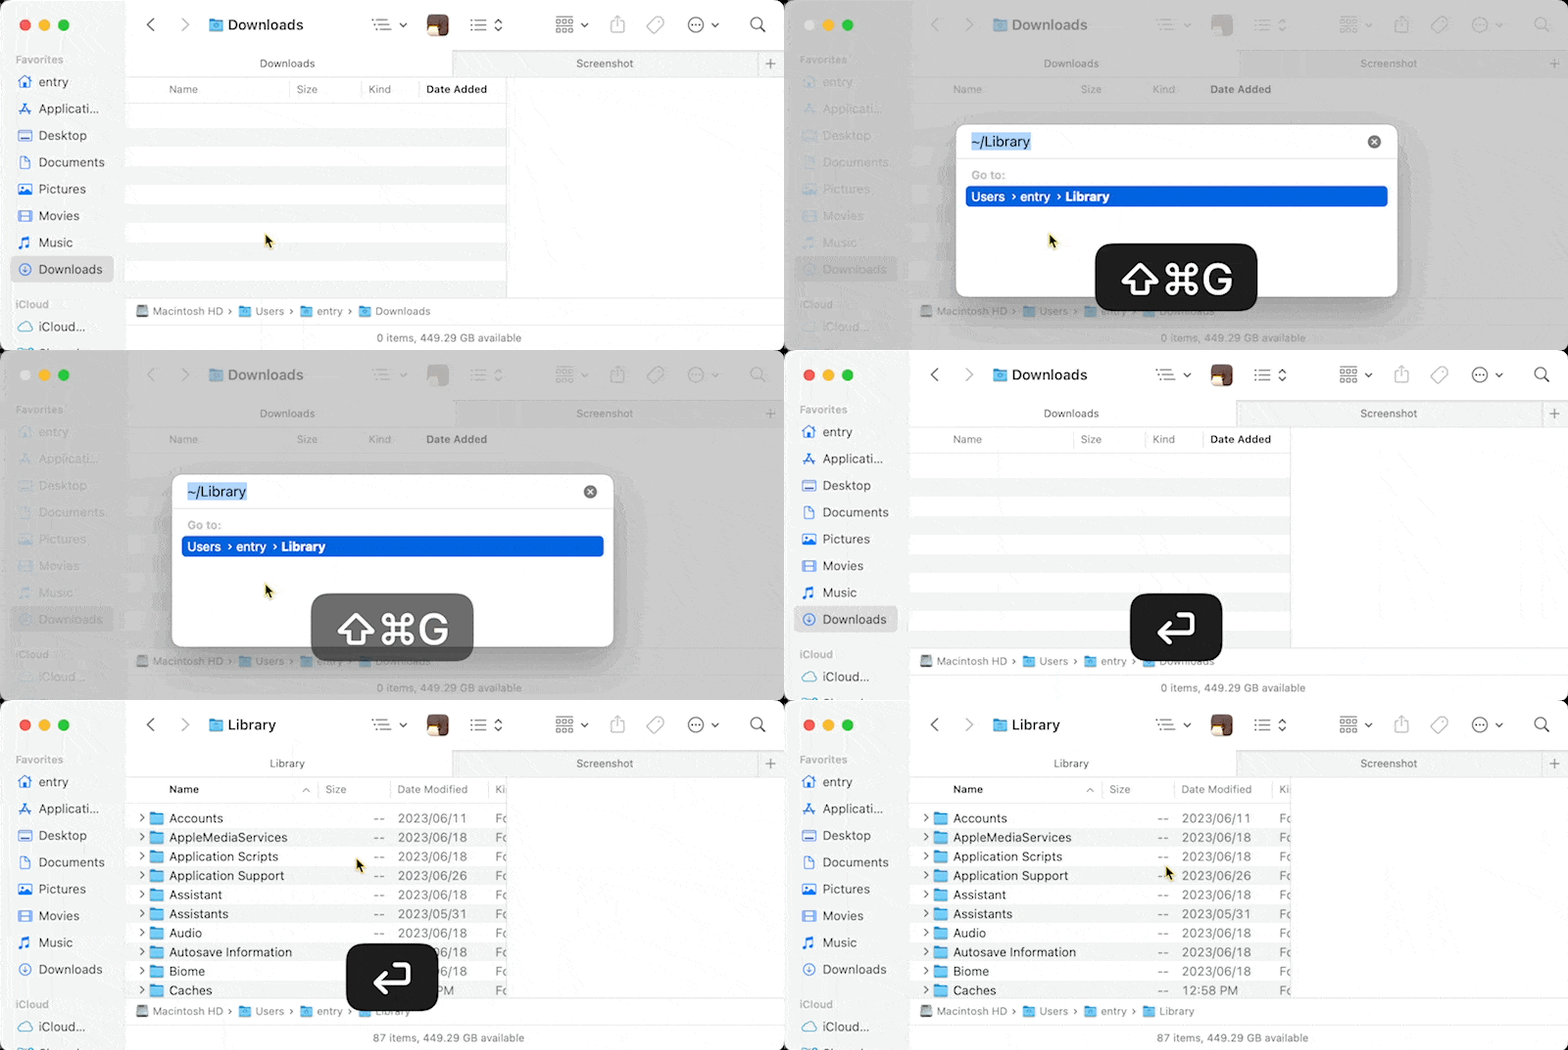
- In the menu bar at the top, click on the “Go” option. Press the combination keys
⌘+⇧+G. - Select the “Go to Folder” option from the drop-down menu. or
- A dialog box will appear. Enter
~/Libraryin the text field and click the “Go” button. - The
~/Libraryfolder will open, and you can explore its contents.
Remember that modifying or deleting files within the ~/Library directory should be done with caution, as it may affect the functionality of your applications or system. Always make sure you have a backup or proper understanding before making any changes.